A Comprehensive Guide To Getting Started With Indigo Dyeing
As a denim enthusiast, what really attracted me to jeans was not only the cool image associated with them. It was the appreciation for the dark blue colour of a new pair of jeans, and how that colour changes and evolves with wear.
It’s through denim that I became acquainted with indigo—something that has become a hobby of mine in its own right. I think every denimhead dreams of making their own jeans and for me, this included making the fabric too. It is through this interest that I got acquainted with indigo as a dye, and fell in love with the Japanese technique of shibori.
Visit our buying guides before your next purchase. We guide you to the best raw selvedge jeans, denim jackets, heavy flannels, T-shirts, denim shirts, and more.
My own adventure with indigo dyeing began when I took a course hosted by Douglas Luhanko and Kerstin Neumüller, who run Second Sunrise in Stockholm, and who have incidentally written a very good book about indigo dyeing.
I’ve put together this guide using the knowledge that I acquired from experts Kerstin and Douglas, along with things I’ve picked up from my own experimentation in my backyard.
In this guide, I’ll cover the following:
- What is indigo and where does it come from
- Preparing your indigo dye bath
- Preparing your fabric, or garment, for dyeing and a basic shibori technique
NOTE!
If you’re intending to use this article as a guide for your indigo dyeing, please read through all sections before starting. It’s best to have everything prepared before you start!
PART I | Indigo: What It Is and Where It Comes From
When you’re working with indigo as a dye, you’ll usually encounter it in a stabilised, raw form in bricks or powder from which you create your dye mixture.
For now, I’ll keep it simple, but understanding where indigo comes from and how it is used to dye with is a subject that we could write an entire member resource on. Oh wait, we did!
Indigo nowadays comes in two forms: plant-based natural indigo and a synthetic indigo, both of which I’ll talk about below.
Natural Indigo
Indigo dye is derived from several plant species across the world, but most significantly from the Indigofera genus of plants from the legume family (that’s peas to you and me) that grow naturally in the temperate to tropical climates of Asia and Africa.
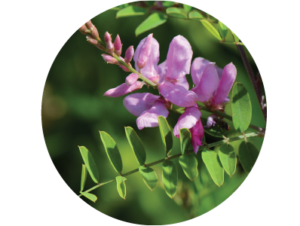
The most significant plant of this family is Indigofera tinctoria—the one below—which yields the highest concentrations of indigo pigment and thus gives the deepest shades of indigo when used in dyeing.
Other species of Indigofera, such as Indigofera suffruticosa, can and have been used to extract indigo for dyeing. But today, most natural indigo sold for dyeing come from Indigofera tinctoria due to the richness of the dye it produces.
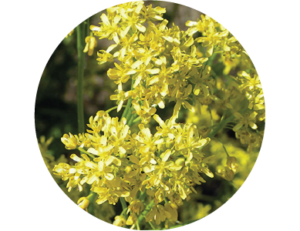
You might come across ‘European indigo’ in the marketplace, but be aware that whilst what you’re buying is indigo dye, it has been extracted from the unrelated Isatis tinctoria (below), or woad as it’s better known, which is more suited to the northern climates and has a huge natural range, from North America, to Scandinavia, to the Siberian steppe.
Woad yields a much lower concentration of indigo dye compared to Indigofera tinctoria and as a result, it gives much lighter shades.
Synthetic Indigo
More commonly today, synthetic indigo is used to dye clothing on an industrial scale due to its easier extraction and abundance of raw material.
Indigo was first synthesised by German chemist Adolf von Baeyer in 1878 from isatin but the synthesis of indigo remained impractical until Johannes Pfleger and Karl Heumann developed a mass production synthesis for BASF, from coal tar. This commercially feasible manufacturing process that was in use by 1897.
Interestingly enough, whilst both natural and synthetic indigo are chemically identical, many people attest to a difference in how they fade.
The Difference Between Natural and Synthetic Indigo
Synthetic indigo has a tendency to create higher contrast fading on jeans, whereas jeans dyed with natural indigo lean towards offering a more equalised vintage fade.
The reason behind this still remains unclear although it should be noted that synthesised indigo is supplied at a 99.9% purity, whereas natural indigo has a purity of roughly 50%. Many people suspect that it is the other natural compounds within natural indigo dye that contribute to the difference in how the dye fades on fabric.
Whichever dye you choose to use to dye with, the process for creating your dye mixture is the same. As synthetic indigo has a much higher percentage of indigo per weight than the natural form, you only need to use one-quarter the amount of synthetic indigo. Indigo in powdered form is one of the easiest forms, as the bricks must be ground to a powder before use.
Let’s get started dyeing! The first step is preparing your dye bath which, when it comes to indigo, is done through a careful process …
PART II | Preparing Your Dye Bath
Unlike some other pigments, the process of dyeing with indigo can be somewhat complicated.
Maybe you’ve re-dyed your black jeans with for instance Dylon dye in the washing machine? Dyeing with indigo is nothing like that. If you throw your indigo powder in the washing machine along with your fabric, you will not get that deep-blue hue you’re after.
That’s because the indigo dye you buy is in a stable, oxidised form (called indigotin), which is not water soluble, meaning it will not bind well to the fabric you’re going to dye.
What you’re going to have to do is make the indigo dye soluble as well as deoxygenate it.
Preparing the Dye
The quantities of each ingredient you’ll need to create your dye will vary depending on the size of the bath you want to create and the concentration of the indigo solution with which you’ll be dyeing.
For this guide, I’ll use natural indigo so make sure to adjust the quantity of indigo if using the synthetic version. Again, no real difference between whether you choose natural or synthetic indigo: I’ve chosen natural as I can buy it easily at a local handicraft shop.
You’ll need:
- A tub large enough to hold 8 litres of dye solution. A 12-litre tub is a good size to allow some room to work with and make sure you don’t spill a lot of the solution
- Rubber gloves! The solution is very alkaline and can irritate skin
- Two 1-litre jars or jugs. Preferably with a lid
- A stirring implement, which can be made of wood or metal, but should ideally reach to the bottom of the bath
- 2 or 3 buckets filled with clean water for rinsing your dyed fabrics. The last bucket should contain a half cup of vinegar
- Litmus strips for testing the pH level of your dye bath
- A clothes line or clothes horse to hang your dyed fabric on afterwards
- 25g natural indigo powder
- 25g/31ml of ethyl alcohol or methylated spirits (you can buy this from your pharmacy!)
- 25g soda ash (sodium carbonate)
- 25g sodium dithionite
PRO TIP!
Make sure you have all your materials and tools ready before going any further. Realising half way that you’ve forgotten an ingredient will ruin your dye solution!
Gotten this far? Great! Now we can start making your indigo stock solution, which is a concentrated form that will be added to the main volume of water later
Step 1: Reduce the Indigo Powder
The first step is to solubilise the indigo powder (or “reduce” it, as it’s technically known).
Pour your indigo powder into one of the 1-litre jars and add the ethyl alcohol or methylated spirits. Mix with a spoon or stirring implement until it forms an even paste.
We’ll call this Jar A.
Step 2: Create a Salt Solution
In your second 1-litre jar, add 300ml of water at 50°c. If you haven’t got a thermometer, make sure it’s warmer than the temperature you’d take a shower at.
To this water you’ll add 25g of soda ash (sodium carbonate) and 25g of sodium dithionite. Gently stir the salts in to disperse them into the water.
Really, do this gently as you want to avoid introducing air into the solution!
This one, we’ll call Jar B.
IMPORTANT!
- Always add the soda ash and sodium dithionite into the water. Never pour the water onto the soda ash or sodium dithionite!
- Always wear gloves and if possible, protective eyewear as soda ash is highly alkaline and will irritate if it comes into contact with your skin and eyes.
You’ll want to use your litmus strip now to check the pH level of the salt solution. Ideally, it has a pH of 11 to 13, which is highly alkaline.
Close the jar with a lid to preserve the heat and let the solution stand for ~10 mins, allowing the salts to dissolve fully into the water.
Step 3: Mix the Reduced Indigo With the Salt Solution
Now you’re going to slowly add the salt solution from Jar B to the indigo solution in Jar A.
You’ll want to make sure that both solutions mix well in order to reduce or deoxygenate, as much of the indigo as possible.
Do this by stirring very gently, avoid any splashing or lifting your stirring implement out of the solution. Again, this is because you want to avoid introducing any oxygen into your dye solution!
Leave your combined indigo solution covered for another 30 minutes to let it completely reduce. By this point, your dyeing solution should have the colour of pea soup, i.e. greenish yellow.
If it looks a rich, dark blue then you’ve oxygenated the mix too much! You’ll need to add more sodium dithionite into your solution and stir gently again to remove the oxygen!
Step 4: Prepare the Dye Bath
You’re ready to prepare your dye bath!
Fill your large bucket in which you’ll be dyeing with 8-10 litres of warm water. You’ll need to factor in the weight of the fabric here and how much liquid it will displace when immersed in your dye bath.
To further ensure that the indigo solution you’ll be diluting into your dye bath is deoxygenated, add 5 grammes of sodium dithionite and 2 grammes of soda ash for every 1 litre of water used in your bath.
Step 5: Add the Indigo Solution
Introduce your reduced indigo solution into the dye bath!
Again, you’ll want to do this whilst minimising the amount of oxygen introduced into the bath. I’ve done this by immersing the entire jar of reduced solution into the bath (with a gloved hand!) and allowing the solution to disperse into the dye bath.
Some people advise against introducing the sediment that might have formed on the bottom, but I’ve found this difficult to do without further oxygenating the dye bath. The sediment is simply indigo that hasn’t become soluble and I’ve never found that the sediment, which sinks to the bottom, has interfered with the results of the dyeing.
You’re ready to dye!
Ideally, you’ll have your fabric ready to dye by the time your dye bath is ready to use. If not, try and cover it or seal the bath until you’re ready to use it.
Now let’s take a look at some dyeing techniques!
PART III | Preparing Your Fabric or Garment, and Creating Patterns With Shibori
There is an almost endless number of ways to dye fabrics: by simply immersing them in for an overall, equal colour, to techniques that will give for some really interesting patterns.
In this guide, I’m going to concentrate on the patterns and designs you can create using a technique known as shibori.
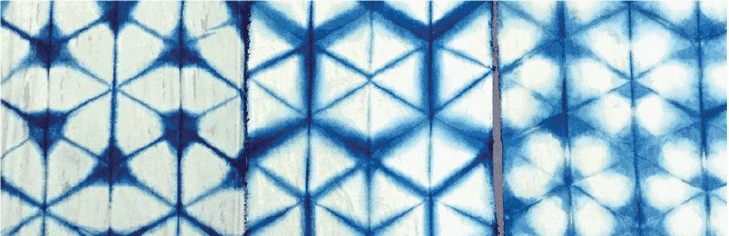
Shibori (絞り染め) is a traditional Japanese resist dyeing technique that dates back to the 8th century.
It’s called a resist dye technique because you can influence the final pattern a fabric dyed in indigo takes by pressing, stitching or folding off portions of the fabric so as to stop the indigo dye penetration certain sections of it. In this, it is similar to batik where you use wax to form sections or patterns on the fabric where the dye cannot penetrate.
There are many different types of shibori available to you but I’d like to concentrate on one of my favourite techniques: Arashi shibori.
Coincidentally, it’s also a fairly straightforward technique to get started with.
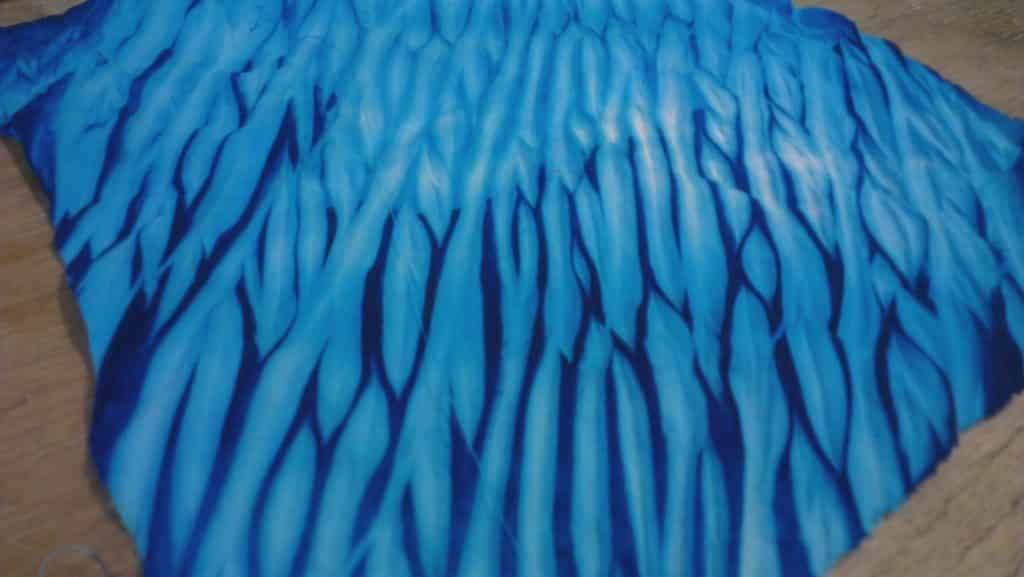
The Arashi Shibori Dyeing Technique
Arashi involves twisting, wrapping and binding of the cloth around a pole. The fabric is wrapped around a pole and then bound. The cloth can be wrapped diagonally, or not, depending on which direction you want your lines to go.
The dyeing technique is also known as ‘storm’ shibori because of the beautiful wavy lines created with this technique that is reminiscent of rain.
For your arashi shibori, you’ll need:
- Fabric of your choice. I used a 50x50cm piece of viscose. (Why? See the notes at the end of this article.)
- A pole or pipe. I used a piece of guttering pipe with a diameter of 20cm (giving a circumference of 60cm) as I didn’t want to double-wrap my fabric
- String or strong thread
The beauty of arashi shibori is that it doesn’t require much equipment or precision. In fact, a lot of people find perfection in the imperfection created with this technique.
Now, let’s prepare our fabric:
Step 1: Prepare your fabric
Decide whether you want to wet your fabric or not.
Wrapping dry fabric around the pole will result in air pockets where the indigo will not adhere to the fabric. This will give a more mottled effect, which can be quite spectacular.
I, however, usually wet my fabric before wrapping. If you wet it, make sure you wring it out thoroughly before proceeding to the next step.
Step 2: Wrap It Around The Pipe
Start wrapping your fabric around the pipe or pole, making sure to have the fabric as flat as possible against the surface of that you are wrapping it around.
As you wrap your fabric, give it a few millimetres of ‘give’ as you’ll have a hard time doing the later steps if it’s wrapped really tight.
Step 3: Wind Thread Around Your Fabric
If you have an elastic band at hand, put it around the edge of the fabric from which you’ll start wrapping string around. This will make sure the fabric stays in place.
Secure your string around the top of your fabric and string wrapping it around your fabric. Each wrap of the string will create a stripe where the dye will not permeate as fully and can be as precise or loose as you like. As such, the more times you wrap the string around your fabric, the more ‘lines’ the resulting pattern will have.
Make sure you leave some ‘give’ (only a very slight give!) when you wrap it as this will make the next steps easier.
Step 4: Secure Your Thread
Once you have wrapped your entire fabric with as much, or as little string as you’d like, tie off the string securely so that it will not unravel during the scrunching stage, or the dyeing process.
Step 5: Scrunch Your Fabric
Scrunch down the fabric into a roll towards the bottom of your pole or pipe.
Make sure that if you want the entirety of the fabric dyed, that the resultant scrunch can be fully submerged into your dye bath!
You’re now ready to dye it!
Step 6: Submerge Your Fabric In Dye
Take off the lid of your dye bath and place the pipe into it so that the fabric is fully submerged into the dye. Do this slowly and carefully without too much movement to avoid introducing oxygen into your dye.
You’ll want to leave it in a stable position in the dye for around 10 minutes.
Step 7: Air Your Fabric
Once your fabric has been in the dye solution for the allotted time, remove the pipe and fabric from the dye bath with as much care as you used putting in there.
If you’ve done this correctly, you’ll notice that your fabric is, in fact, not a dark shade of indigo but more of a yellow-green colour.
Step 8: Remove Threads From Your Fabric
Once you’ve dyed everything you want, remember to replace the lid on your dye bath to preserve it for further use later.
Remove the thread by untying or cutting it off. Try to wear gloves as the dye solution can be irritating to the skin.
Remove the fabric from the pipe and make sure any excess dye has dripped off. Hang it up to dry for a further 10 minutes.
Step 9: Rinse Your Fabric
Remember those buckets you prepared with fresh, clean water? Good!
You’ll take your fabric now and rinse off any excess dye that is loose on the fabric in these buckets. When the water in one bucket runs blue, continue rinsing in the second bucket.
You might also want to rinse it in your final bucket with a little bit of vinegar to really get any excess dye off. Once you’re satisfied that any excess dye has been removed, hang it up to dry one last time.
If you’re planning to use your dyed fabric as a scarf or something that will encounter friction, you might consider washing it one last time on a cold cycle in a washing machine. This will minimise any crocking onto light coloured clothing!
That’s it! While dyeing with indigo does require a fair amount of preparation and care, the results you can achieve by playing with shibori techniques can be quite spectacular!
NOTE ON FABRIC
I often choose to use viscose, as opposed to cotton, as it remains soft after dyeing, making it ideal for a scarf or something similar. Viscose, like cotton or linen, is a fabric made from natural cellulose fibres and as such, takes the indigo dye quite well.
Cotton can be used to more hard-wearing items like pillow cases or bags, but you can also use wool and synthetic fibres. Some people might avoid using synthetics as the indigo can have trouble binding to these fabrics: they tend to have a tighter weave so the indigo molecules have less chance of getting lodged between the fibres. However, dyeing synthetic fabrics is not impossible and can give interesting results. Part of the fun and charm of dyeing with indigo is in the experimentation!
On the Hunt For Raw Selvedge Jeans?
Launched in 2011 by Thomas Stege Bojer as one of the first denim blogs, Denimhunters has become a trusted source of denim knowledge and buying guidance for readers around the world.
Our buying guides help you build a timeless and adaptable wardrobe of carefully crafted items that are made to last. Start your hunt here!
Share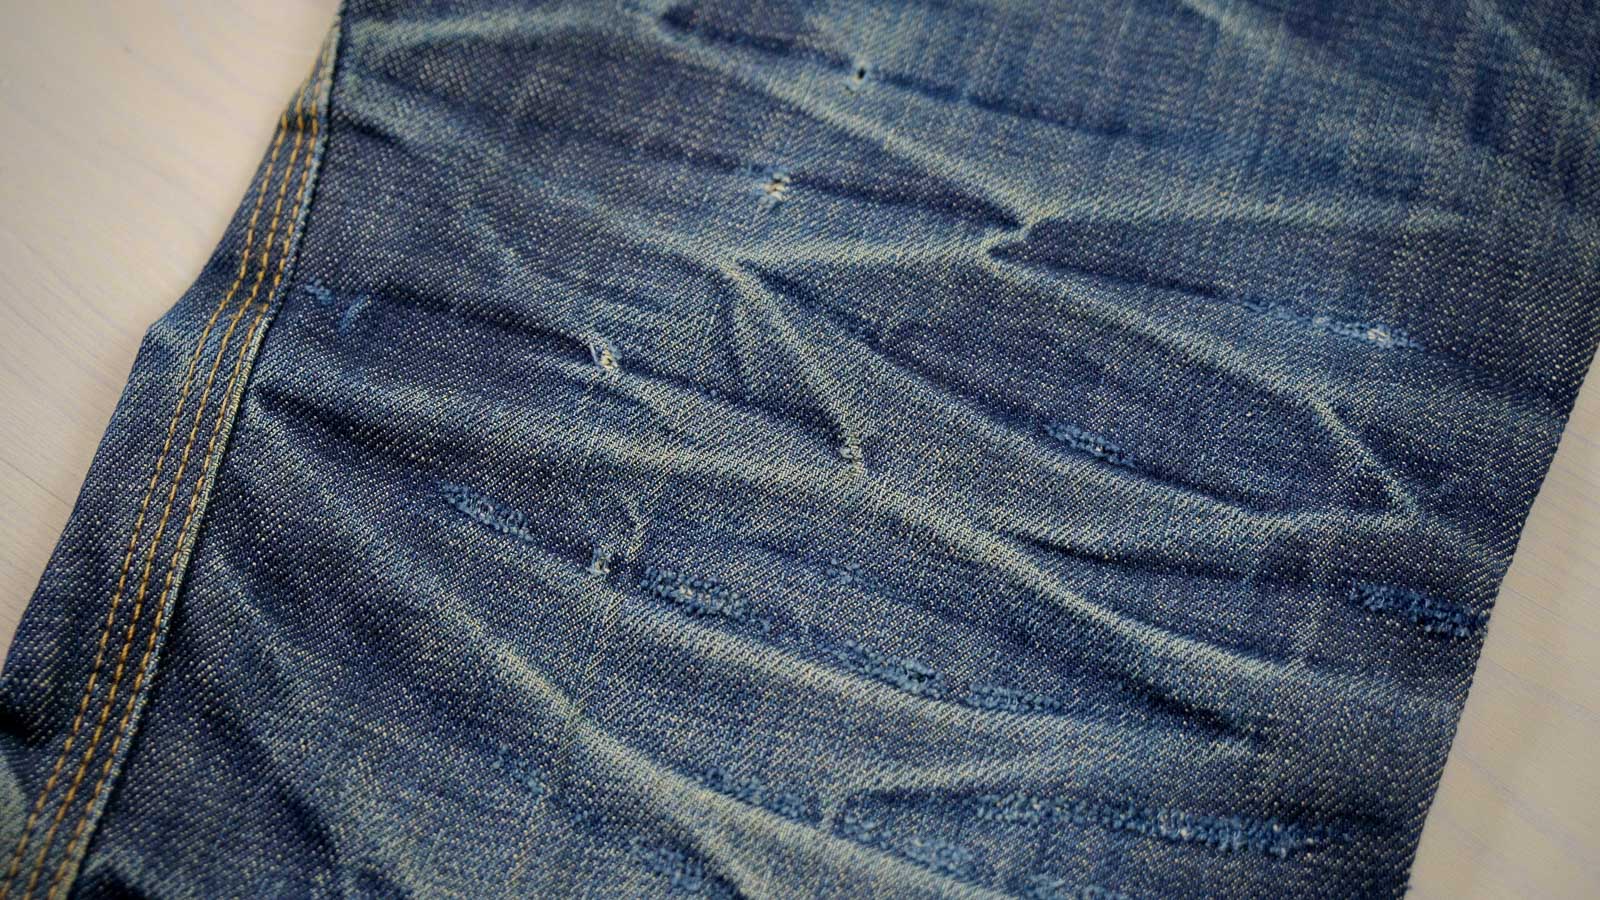


Congrats Thomas to your awesone indigo article!! Very interesting and inspireing